Cooktops cut to the template, slide-ins flush to the counter
A range that rocks or a cooktop that won't drop in usually isn't an appliance problem — it's a fit problem. We connect the gas or power, set the unit to spec, and do the cabinet and counter work when the opening is a hair tight.
- Gas connections leak-tested before the unit goes back
- Cutouts sized to the manufacturer template, not the old hole
- Anti-tip bracket installed on every range
A slide-in range needs to sit flush against the counter with its side panels parallel to the cabinets and its top edge resting on the countertop lip — not floating above a gap or wedged in at an angle. A drop-in cooktop needs a countertop cutout matched to the manufacturer's spec, square corners where they call for them, and enough clearance below for the burner box and any downdraft. Get the opening and the utilities right and the unit drops in and lights up. Get them wrong and you're left with a rocking range, a cutout that's a quarter-inch shy, or a gas connection nobody wants to stand behind.
The problems we actually solve
The 30" or 36" unit won't slide between the cabinets
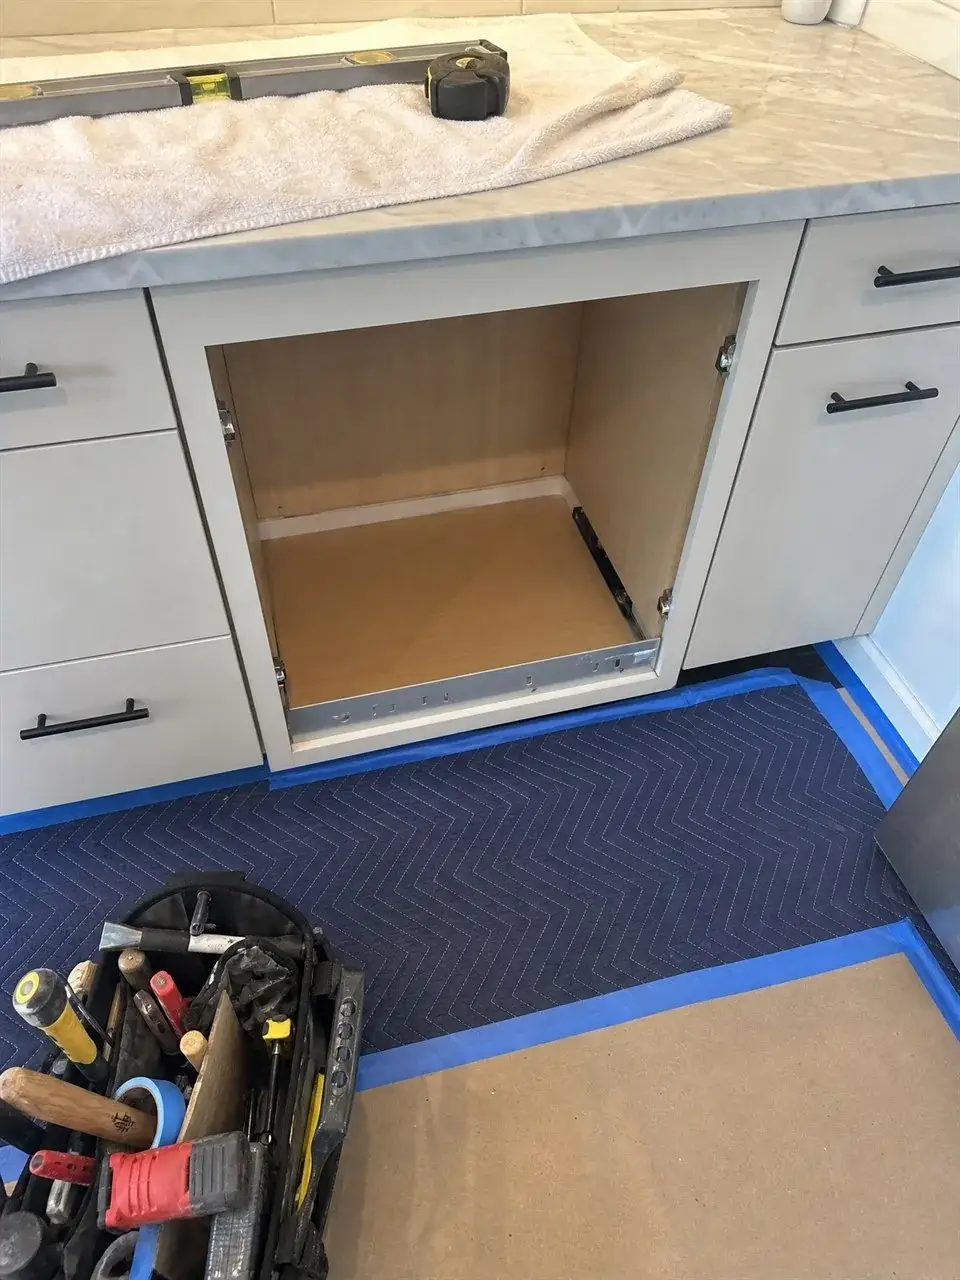
Cabinet boxes that measure a touch under nominal turn an easy drop-in into a forced shove. We trim the opening or add a thin filler so the unit slides in square instead of scraping the finished sides.
The cooktop cutout is the wrong size or shape
An existing hole rarely matches a new cooktop's spec — too small, too large, or radiused where the new unit wants square. We enlarge, square, or build up the cutout to the dimensions printed in the manual.
The range rocks or stands proud of the counter
Uneven floors and slab thickness make a slide-in sit high, low, or tilted. We level the legs, set the height so the top rests on the counter, and tie in the anti-tip bracket so it stops moving.
Range & Cooktop Installation, done properly
Connect gas or electric
Coordinate the gas line or 240V circuit, connect with the right flex connector or cord and plug, and check for leaks and a solid ground before the unit ever gets pushed back.
Set the range level and square
Adjustable feet dialed in with a level on the cooking surface front-to-back and side-to-side, the front face lined up with the cabinet doors, and the top sitting tight to the countertop edge.
Cut and fit the cooktop opening
Countertop cutout sized to the manufacturer's template, corners squared or radiused as specified, and the unit seated on its gasket or clips so the rim sits flat with no rocking.
Anchor the anti-tip bracket
Anti-tip bracket fastened into solid framing or the floor at the correct setback so a loaded oven door can't pull the range forward — required by every range maker, and we don't skip it.
Adjust the cabinets for a tight unit
When a 30" or 36" opening runs narrow, we trim the box edges, add and scribe a filler strip, or shave an end panel so the range or cooktop cabinet fits without bowing the sides.
Match overhang and reveal
Counter overhang and the side gaps checked against the unit so the range face lines up with the cabinet fronts and the reveals stay even from the controls down to the toe kick.
What we account for
-
Gas, propane, or electric
Each needs different prep: a gas range wants a shutoff and the right connector, a propane unit needs the correct orifices, and an induction or electric cooktop usually needs a dedicated 240V circuit sized to its rating. We confirm what's behind the wall before the old unit comes out.
-
Clearances and combustibles
Ranges and cooktops have minimum clearances to side walls, upper cabinets, and any adjacent overlay panel. A slide-in next to a tall cabinet or a cooktop under a window each have rules worth checking before, not after.
-
Counter material and cutout strength
Quartz, granite, butcher block, and laminate each cut and support differently. An oversized or poorly supported cutout can crack a stone top, so the opening size and the rail or bracket support under it both matter.
When the opening fights the range, we fix the opening
The two failures we get called on most: a drop-in cooktop whose template doesn't match the hole already in the counter, and a slide-in that sits proud of the counter or rocks once the anti-tip bracket goes in. Both come down to carpentry, not the appliance. Because we cut to the cooktop template and adjust the cabinet and counter ourselves, the opening gets squared, the filler scribed, and the legs leveled to the anti-tip setback in the same visit the unit goes in — install and fit handled by one crew start to finish.
See how cabinet modification worksFrom measurement to a clean, level fit
- 01
Assess & measure
We start with the appliance spec sheet and the opening it has to live in — width, depth, height, the face frame, utilities, and the cabinet around it. Most fit problems are decided here, before a single tool comes out.
- 02
Protect the kitchen
Floors, countertops, and finished cabinet faces get covered, padded, and taped off first. Blue tape on the edges, moving blankets and ram board on the floor, and a vacuum staged for dust control.
- 03
Install & fit the cabinet
We set the appliance — and when it does not drop in clean, we modify the cabinet to make it: resizing the opening, building a support platform, adding filler strips, or aligning panels and trim for an even reveal.
- 04
Level, test & clean
The appliance is leveled, secured, and anti-tip hardware set where it belongs. We test operation, check every reveal and gap, then vacuum and wipe down so the kitchen is ready to use.
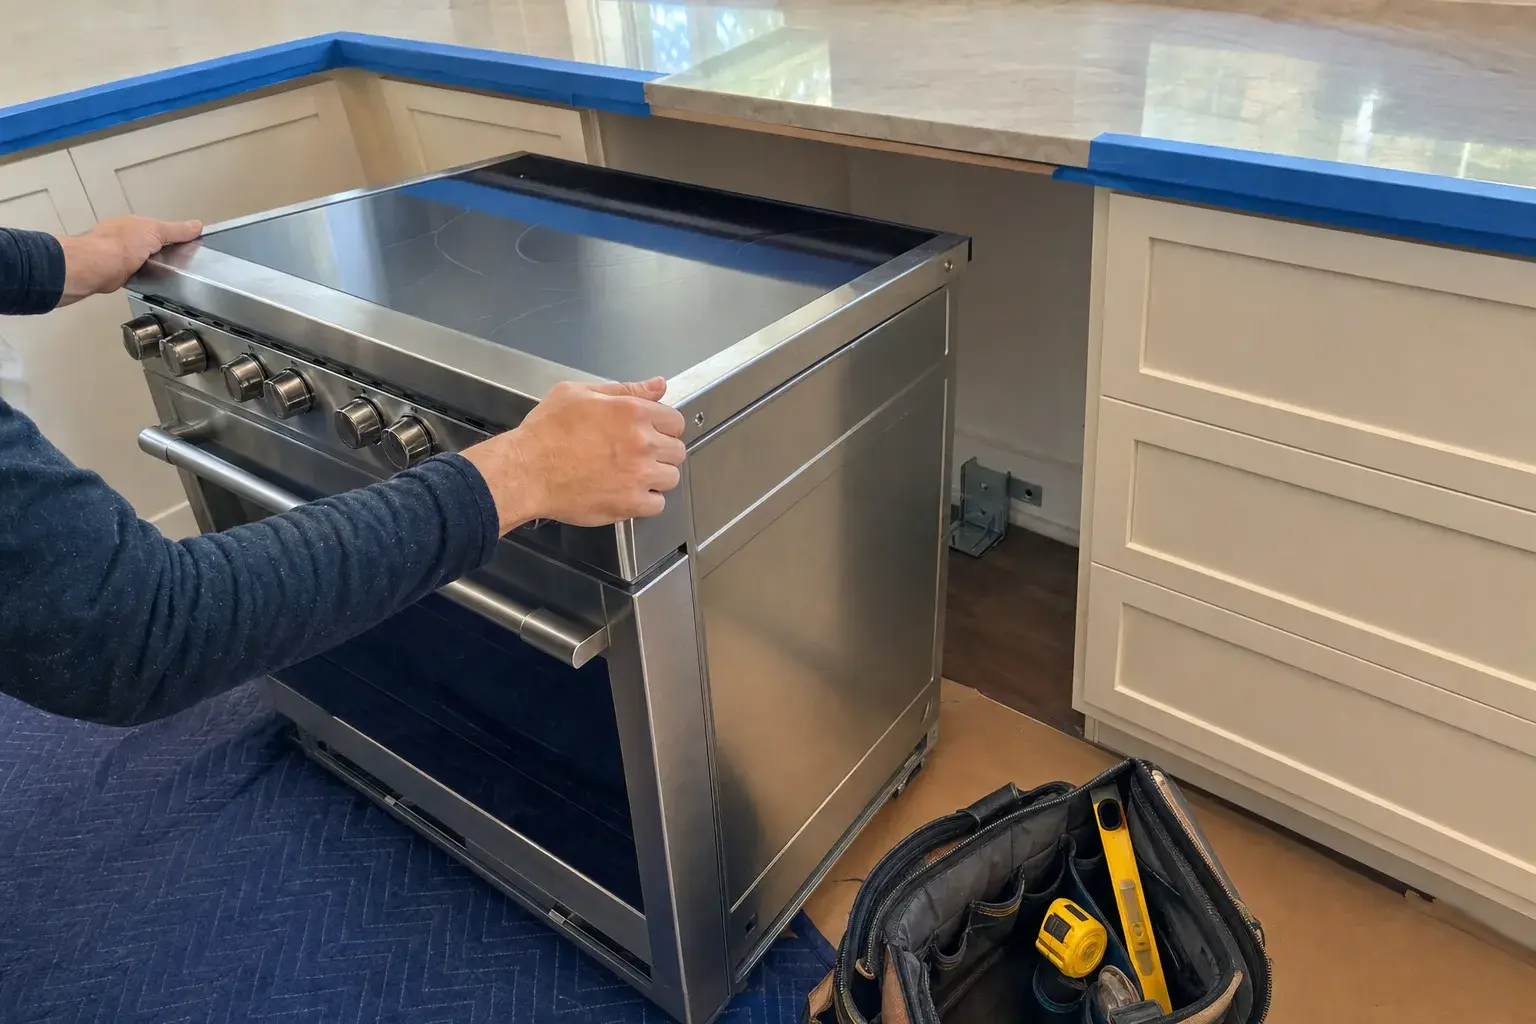
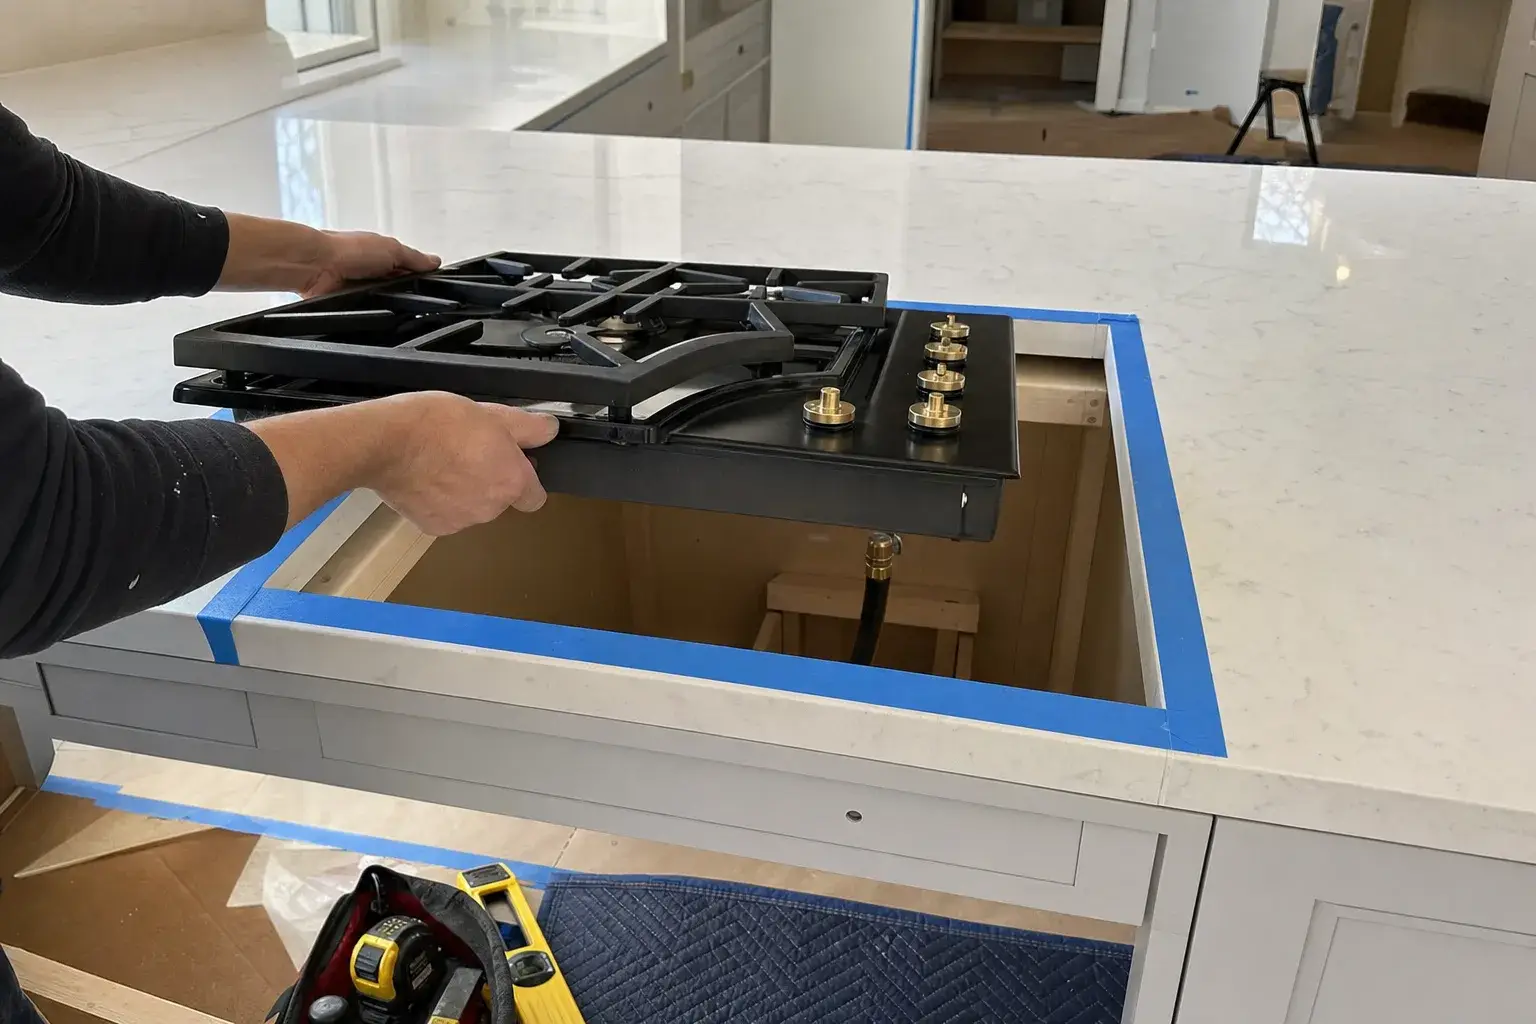
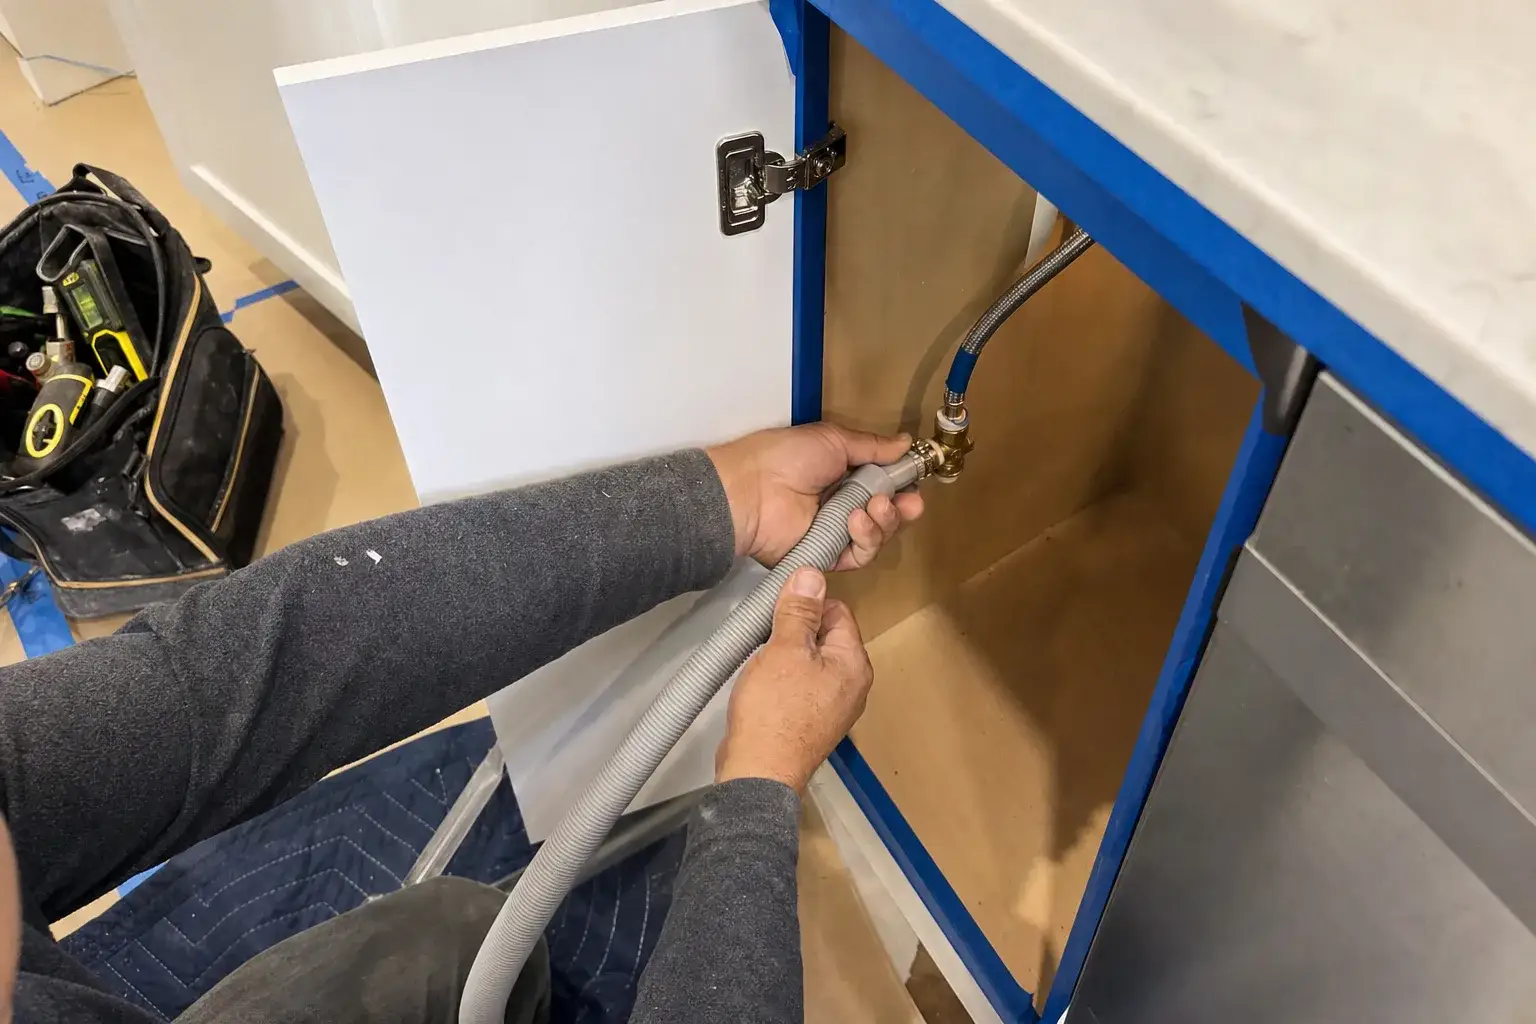
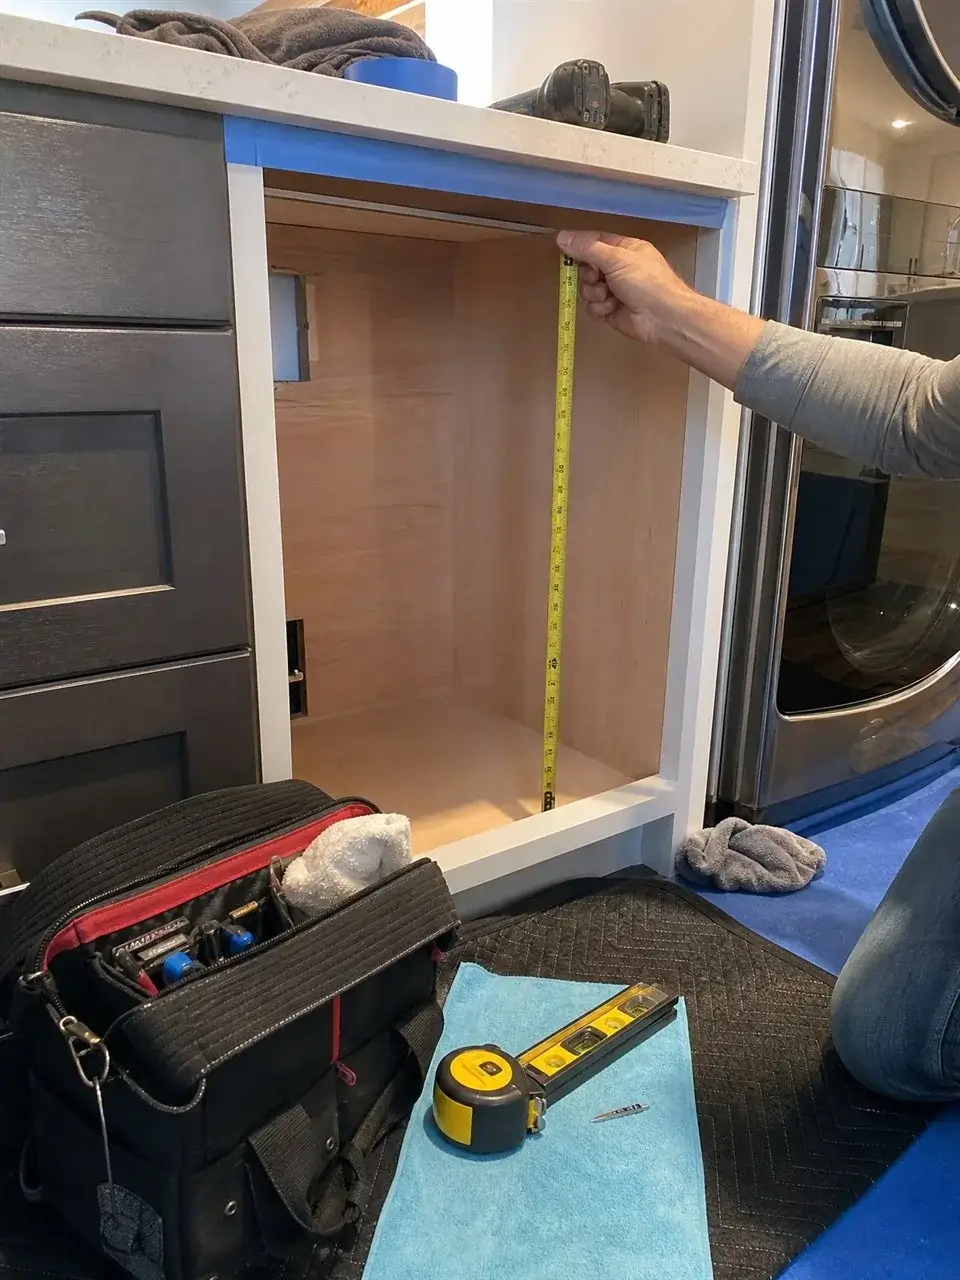
What this work looks like in the field
Measuring, protection, and the cabinet detail that makes the fit clean — photographed on real jobs.

Brands we install and fit
- Wolf
- Thermador
- BlueStar
- Bertazzoni
- GE
- Bosch
- KitchenAid
What range & cooktop installation typically costs
A flat $89 service call covers coming out and assessing the job against your appliance spec. Project pricing starts from the figures shown and is confirmed on site — cabinet work has a lot of variables, so we quote it exactly once we see the space.
Range & Cooktop Installation: common questions
My new range is the same nominal width as the old one — why won't it fit?
Nominal sizes are rounded. A 30" range can run a hair over 30", and cabinet boxes built a touch under nominal leave you short. We measure the actual opening against the real appliance footprint and, if it's tight, trim the box or add a filler so it slides in square instead of being forced.
Can you reuse my existing cooktop cutout for a new unit?
Sometimes, but rarely without adjustment. Cutout dimensions vary between models and brands, and the new unit's template almost never matches the old hole exactly. We compare the spec to your existing cutout and enlarge, square, or build it up as needed so the rim seats flat with no gaps.
Do I really need the anti-tip bracket?
Yes. Every range manufacturer requires one, and it's what keeps a loaded oven door from tipping the range forward. We anchor it into solid framing or the floor at the correct setback on every slide-in and freestanding range we set.
Can you handle the gas or electrical connection too?
We connect the unit to an existing, properly located gas shutoff or 240V outlet, leak-test gas joints, and confirm a solid ground. If the supply needs to be moved or a new circuit run, we'll coordinate that so the install isn't held up by surprises behind the wall.
Slide-in versus freestanding — does it change the install?
It changes the fit. A freestanding range has finished sides and a back control panel and tolerates a wider gap. A slide-in has unfinished sides meant to be hidden by the counter and cabinets, so the opening width and counter overhang have to be dialed in for the top to sit flush. We set either, and adjust the cabinetry to suit the type you chose.
Should I have you out before I order the cooktop or range?
It helps. Bring us the model and its cutout template and we'll measure your opening, counter, and the gas or power behind the wall, then tell you whether it drops in clean or needs the cabinet adjusted first. Call us with the spec sheet and we'll walk the opening before anything ships.
Often part of the same job
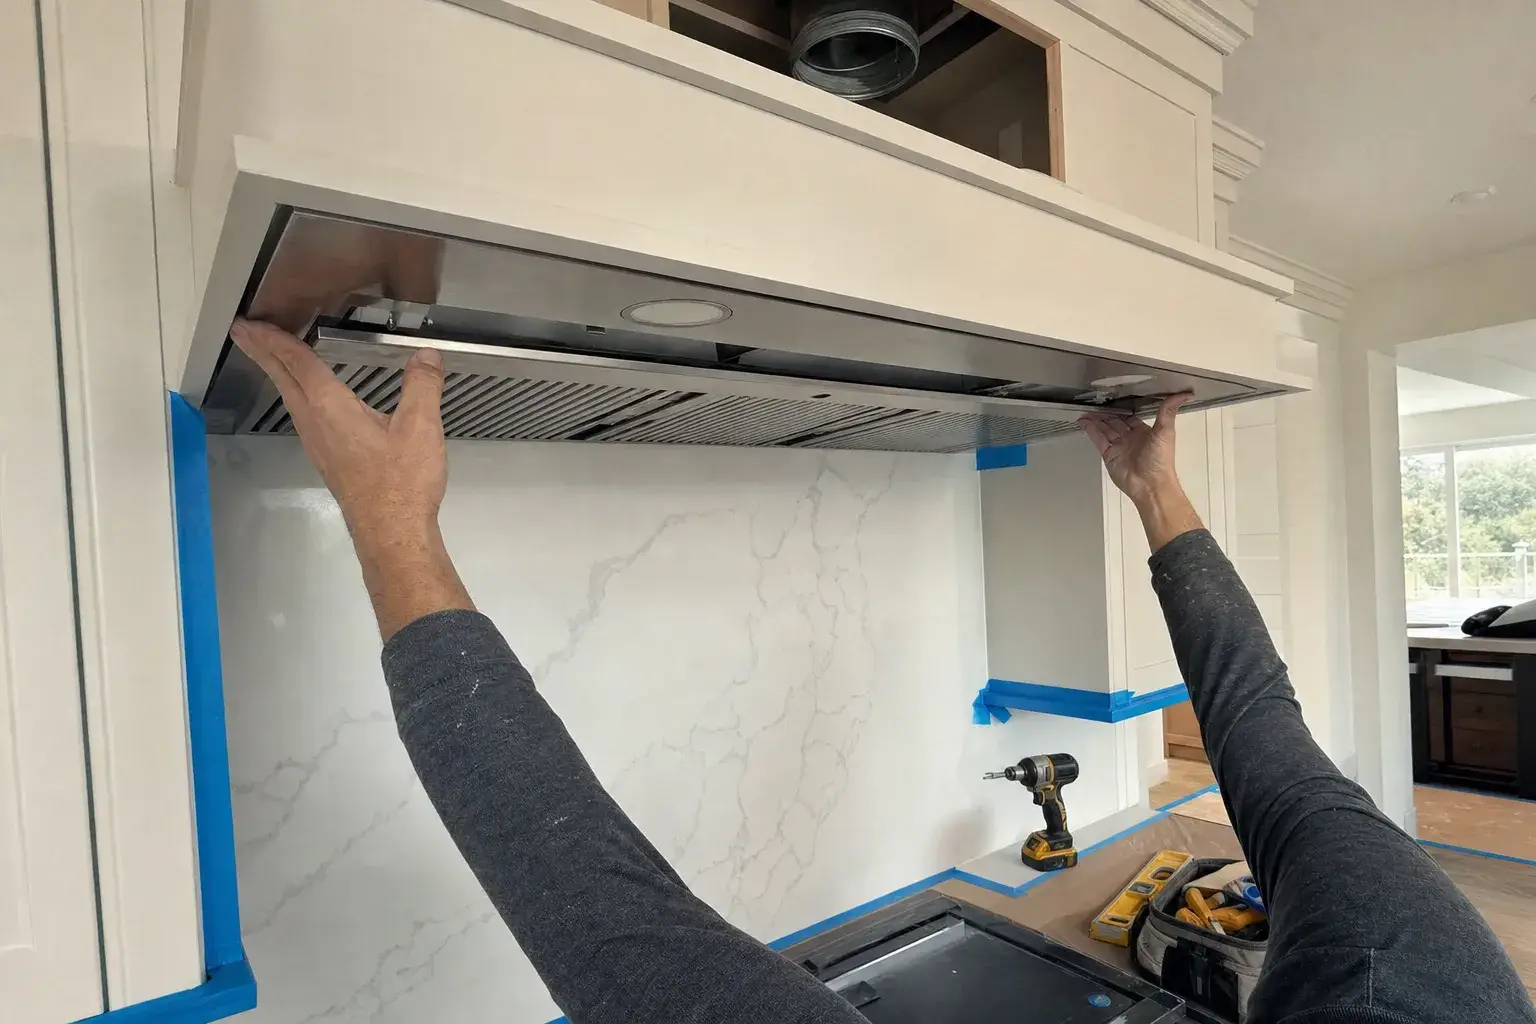
Range Hood & Venting
We mount the hood, run the duct through the cabinetry, and do the surround carpentry so the insert sits flush at the right height and the venting actually pulls air outside.
Learn more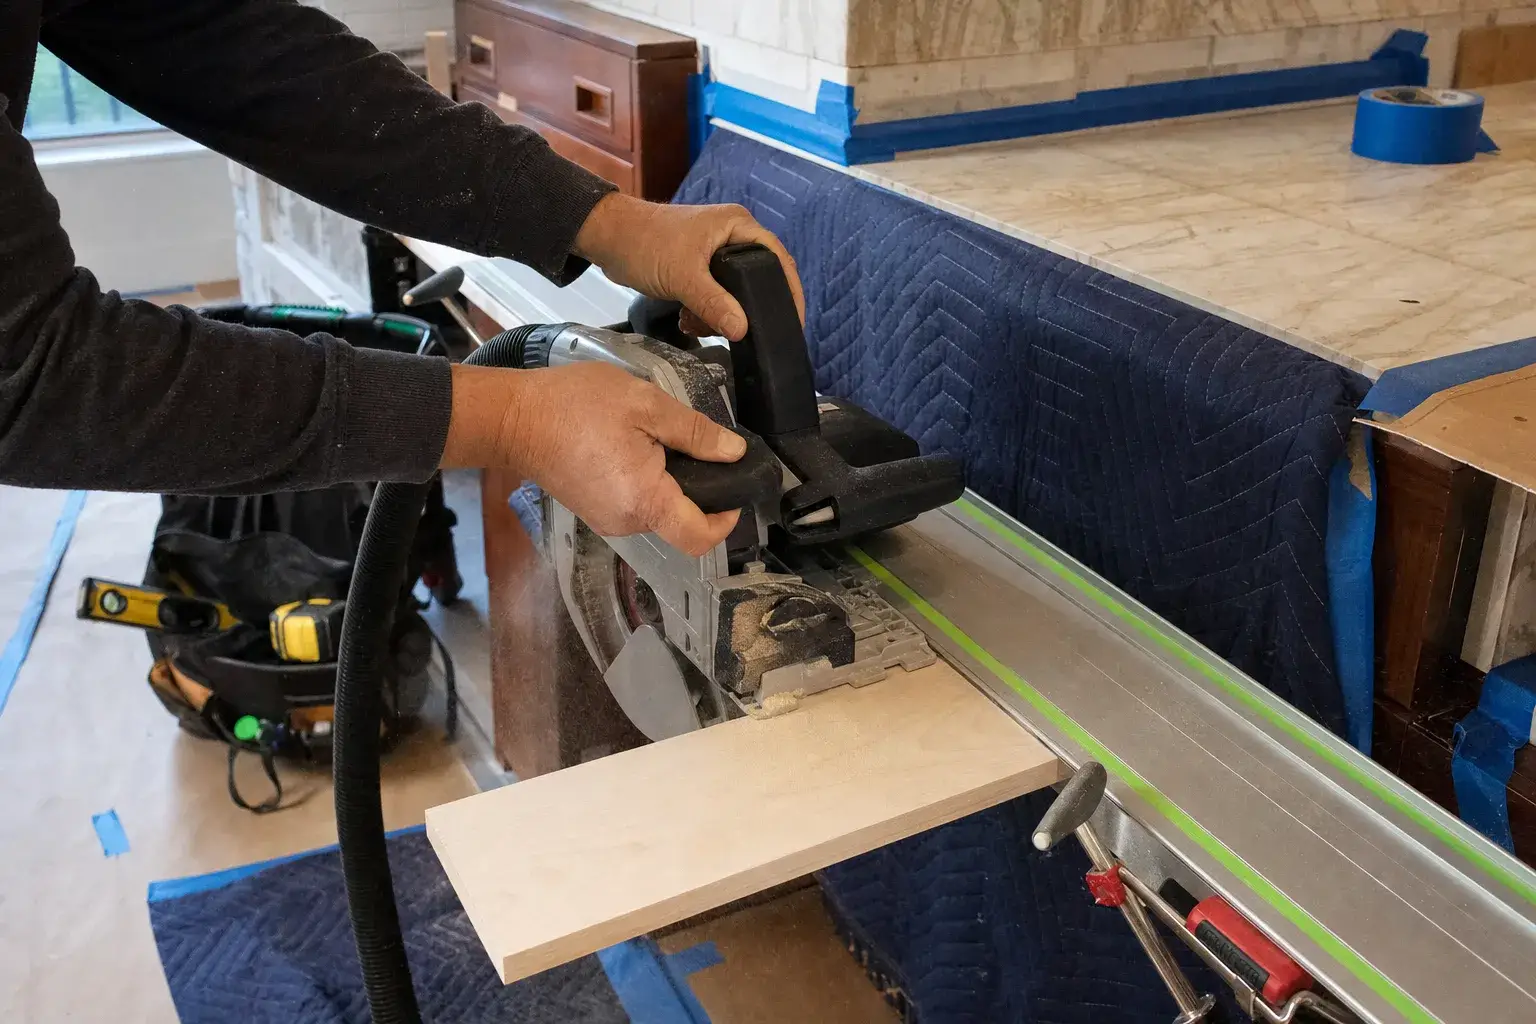
Cabinet Modification
When an opening is a half-inch too tight or a face frame is in the way, we modify the cabinet so the appliance fits — square, level, and damage-free.
Learn more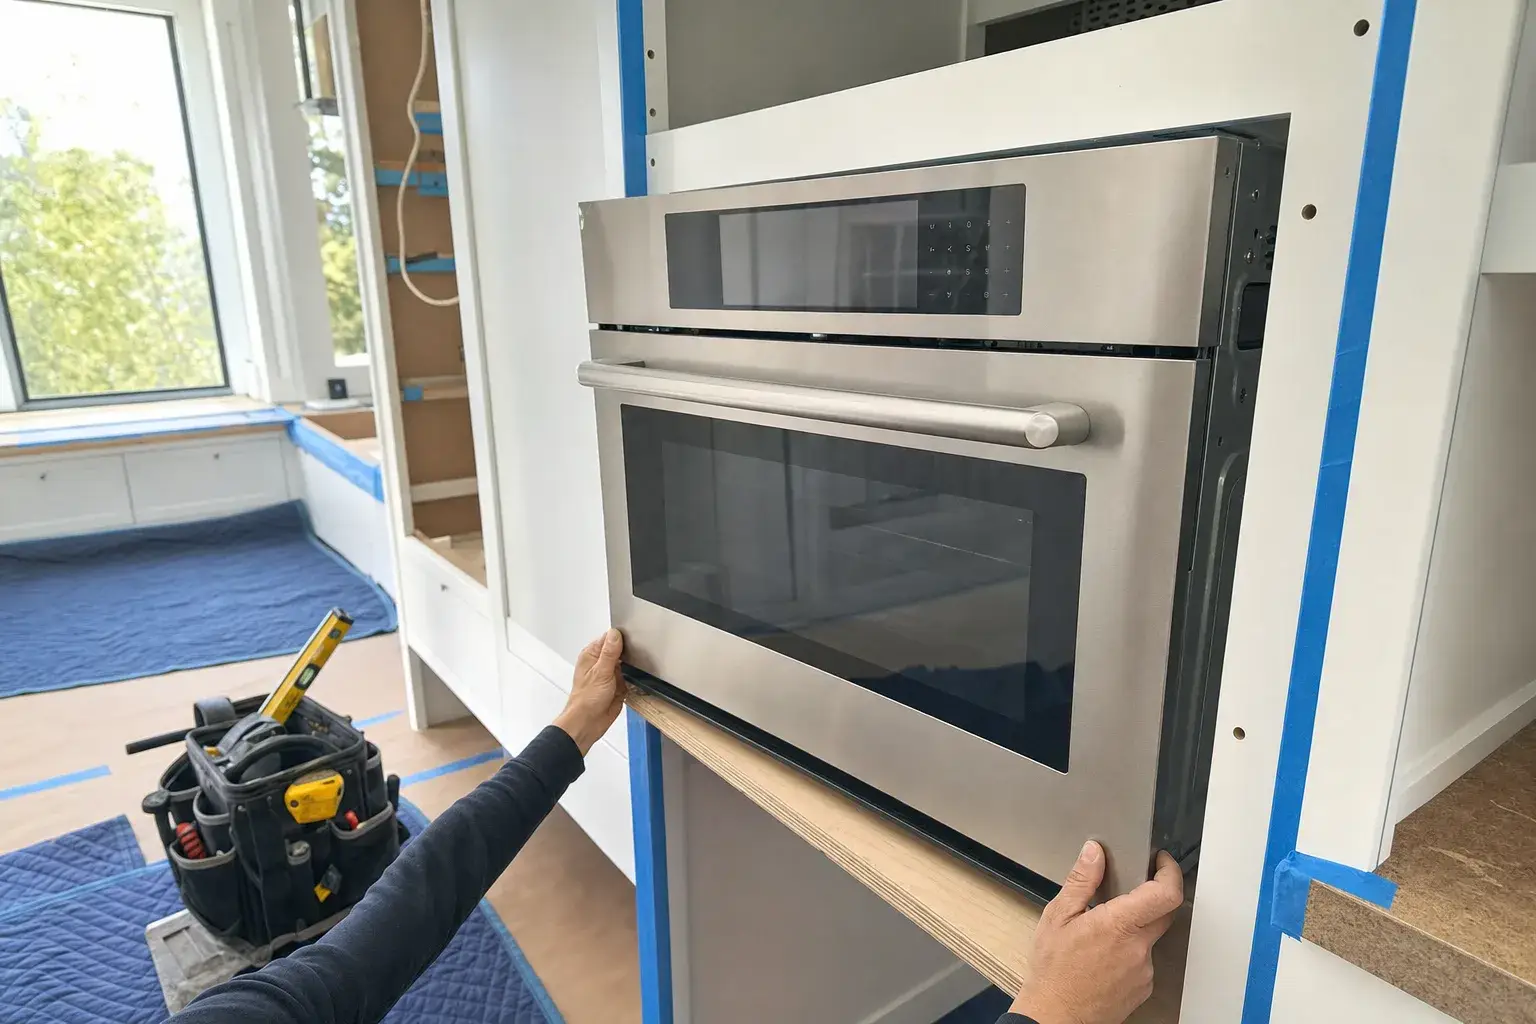
Wall Oven Installation
We set single, double, and oven-microwave combo wall ovens at the manufacturer's mounting height, build the platform that actually carries the weight, and make the two-person lift so the unit seats flush and stays put.
Learn moreRange & Cooktop Installation — what homeowners say
I needed a gas range hooked up and was nervous about finding someone reliable. These guys were licensed, explained the safety checks, and everything passed. Peace of mind.
My Samsung range delivery was delayed and they came out on short notice when it finally arrived. Super flexible scheduling. The install itself was perfect.
Very straightforward process. Booked online, got a confirmation text, tech arrived in the window, installed my new range, left zero mess. Exactly what you hope for.
Had a gas line that needed extending for my new freestanding range. They handled the permit process and inspection. Worth every penny for the peace of mind.
Had three appliances installed in one visit — range, hood, and dishwasher. All done in about 2.5 hours. Efficient team, professional finish.
English wasn't a barrier at all — very clear communication throughout. My oven works perfectly and they tested every burner before leaving. Truly thorough.
Get your appliance opening checked before delivery day
Send the appliance specs and a couple of photos of the space. We confirm the fit, flag any cabinet work, and give you a clear plan — no guesswork on install day.